
Installation Guide
Essential guidance for installing Sterra laminate flooring.
Laminate Flooring Installation Guide
Important: Begin installation at the top right hand corner of the room.
Planks are installed from the right to the left-hand side of the room.
NOTE: It is important to read the instructions before installation. It is the Owner/Installer responsibility to make sure the below conditions are met prior to installation.
All installs now require a moisture barrier of minimum 6mil plastic film under this flooring.
The ideal conditions are 40%-60% relative humidity. If the rooms have higher levels of humidity, or if the home has a crawl space and/or cellar or is considered a cottage, please consult a specialist in your area and/or the construction norms.
Subfloor
A) Concrete Floors
- The surface must be absolutely level, dry and clean. Differences in the floor level of more than 3/16"in 10ft must be leveled.
- Use a vapor barrier at least 6mil thick. Edges should overlap by 8 inches and be taped.
- Ensure that one inch of the vapor barrier is up on the walls.
- If moisture from concrete exceeds 4%with Tramex Concrete Moisture Encounter, use additional moisture prevention before installing any flooring. If moisture exceeds 8 pounds using a Calcium Chloride test, then use additional moisture prevention before installing any flooring.
- Pad attached flooring does not count as a moisture barrier.
- Lay down flooring.
B) Wood and other hard surfaces
- The surface must be dry, clean, smooth and level. Floor must be within 3/16"in 10ft levelness.
- Fix any squeaks,remove any staples, loose boards, etc. prior to installing flooring.
- Lay down flooring.
C) Carpet and underpadding
- Remove both before laying down the floor, and proceed as outlined in A or B.
D) Vinyl floor surfaces
- Lay down flooring. (If the vinyl is on top of concrete, a moisture barrier must be placed on top of the vinyl before installing the floor).
E) Radiant heat floors
- Follow the installation instructions provided by the radiant heat manufacturer.
- New concrete subfloors must be cured with no heat transfer for 60 days.
- The radiant heating must be operational for two weeks prior to installing the laminate flooring, and the temperature must be maintained between 65-72°F.
- Keep the temperature below 80°F at all times.
- Slight gaps may occur between laminate planks installed over radiant heating and will not be covered by the warranty
Preparation
1) Leave closed packages in a horizontal position in the room for 48 hours prior to installing. Subfloor needs to be prepared (as above).
2) There must be at least ½” between the surface of the floor and the bottom of electrical baseboard heater to allow heat to circulate.
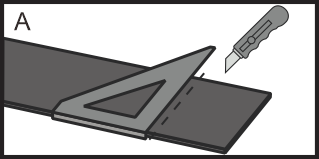
3) Verify door and frame clearances and make required adjustments before laying down the floor. Cut the door molding with a saw to allow planks to slide underneath.(See figure A.)
4) Carefully remove existing baseboards. When putting baseboards back, make sure they do not pin the floor, leave business card gap so floor can expand and contract.
5) Decide in which direction the planks should be laid As a rule, the floor planks should be laid perpendicular to the wall that has a window in it. To make the room appear larger, it may be preferable to lay down the floor planks parallel to the longest wall.
6) Before installing, check planks for defects such as chips and color or sheen differences under good light conditions. Check that the channel is clean and free of debris. Damaged planks must be replaced before laying down the floor.
7) A minimum expansion area is required around the perimeter of the room as well as any fixed object(door frame, fireplace mantle, etc.): 3/8" for rooms 25 ft long or wide, 5/8" for rooms greater than 25 ft.
NOTE: Safety glasses and gloves should be worn at all times.
Installation
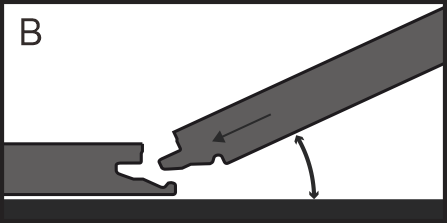
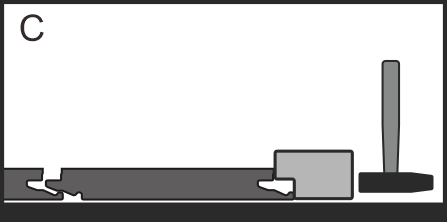
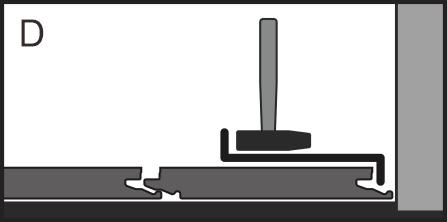
1) Installation method: the planks click together at a 45° angle on the length side (see figure B). Note that a tapping block and mallet may be used for a tighter fit along the lengths of planks. Do not use excessive force, as this may damage the tongue and/or groove. Connecting the short ends together must be done using a tapping block and mallet tapping the tongue into the groove (see figure C). When installing the last plank in a row, it may be necessary to use a pull bar. Place the pull bar between the wall and the laminate and gently tap on the lip on the top (see figure D).
2) Measure the room to establish its squareness and the width of the last row. If the width of the last row is less than 2 inches, not including the bottom lip of the groove, the first row will have to be cut accordingly. The tongue on the first row of planks and the bottom lip of the groove side on the last row of the planks should also be removed (see figure E). Use T-moldings if the floor is wider or longer than 33 ft.
3) Irregular wall along the first row of planks-scribe the planks to fit the wall and cut.
4) When cutting a plank, if using a portable electric saw (jigsaw) the decorative surface must face up. If using a circular table saw, the decorative surface must face down.
5) Begin installation on the top right hand corner of the room, with the tongue side against the starting wall. Always place a 3/8"-5/8" spacer between the wall or any fixed object (door frame, fireplace mantle, etc.) and the plank on either side of each joint and at the far ends of each plank.
6) The first and last plank in a row must be at least 12" long. Measure the first row before installing. To avoid ending the row with a plank of less than 12" in length, it may be necessary to cut the first plank. Always remove the groove on the last plank. For the first plank of the second row, us the cut plank left over from the first row provided it is more than 12" long. If it is less than 12" long, use a new plank, cutting it so it is at least 12" away from the joint of the first plank on the first row. Always remove the bottom lip of the groove and the tongue from the ends of the planks against the walls (see figure E).
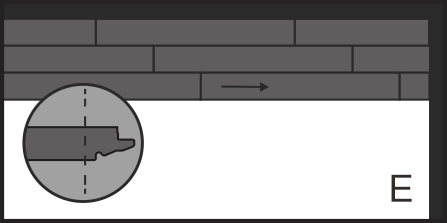
7) Continue laying down the floor from right to left. For a stronger and more natural looking floor, make sure to stagger the joints in each row by at least 8". Remove the spacers and install moldings and trims. Never nail the moldings to the laminate floor.
8) Transition moldings must be added between every doorway to allow for the natural expansion and contraction of the floor.
9) When installing laminate in the kitchen or other areas, do not install cabinets, islands or other items onto the flooring. Laminate is a floating floor that cannot be pinned down.Failure to do so will void any warranty.
Important Installation Information
Note: It is important to read the full installation guide prior to beginning your installation.
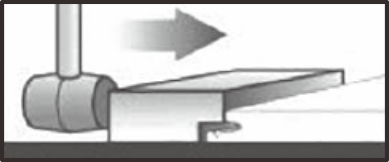
Tapping block
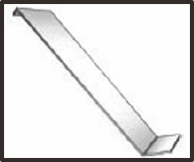
Pull bar
Other tools: hand saw or power saw (fine-toothed carbide blade), chalk line/string, spacers, set square, vapor barrier: min. 0.006"mm / 0.15mm (for installation on concrete and radiant heat floors), pencil, tape measure, tapping block, rubber mallet, pull bar, utility knife
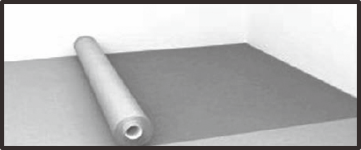
Always install a vapor barrier of 0.006" (0.15mm) over concrete or radiant heat floors.
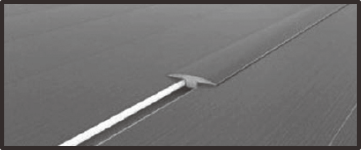
It is necessary to install a T-molding in any room that is greater than 33 ft (10 m) In either length or width.
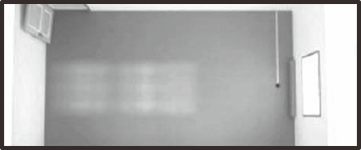
For rooms less than 25 ft (7.6 m) long or wide, leave expansion gap of 3/8" (10 mm).
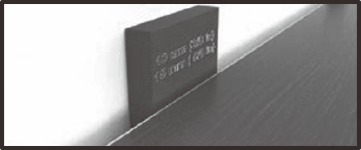
For rooms greater than 25 ft (7.6 m) long or wide, leave an expansion gap of 5/8" (15 mm).
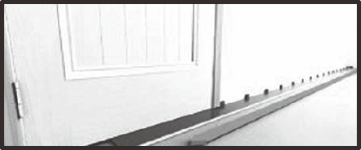
Begin the installation at the top right-hand corner of the room. Install each row from right-to-left.
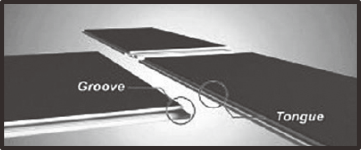
The tongue clicks into the groove.
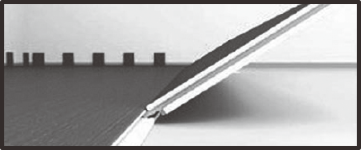
The planks click together at a 45° on the length side.
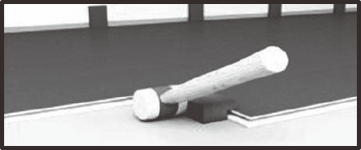
On the short end of the plank, tap the boards gradually into place using a rubber mallet against the tapping block.
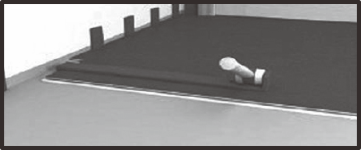
Use a pull bar to install the last plank in a row. Place one end of the pull bar between the wall and the plank and gently tap the other end of the pull bar.
Copyright © 2020 Sterra. All rights reserved.